Page History
Authorization
- This section is designed for describing the administrative functions of the Paykassma product. To get started, go to your Personal account using the link provided by Paykassma.com TS.
In the authorization form, fill in “Login” and “Password” fields (data is provided during registration).
| Info |
|---|
If necessary, Paykassma service can provide additional user accounts. |
Table of contents
| Table of Contents |
|---|
Dashboard
After authorization, the main page of the product (dashboard) which contains basic summary statistical information about all wallets opens.
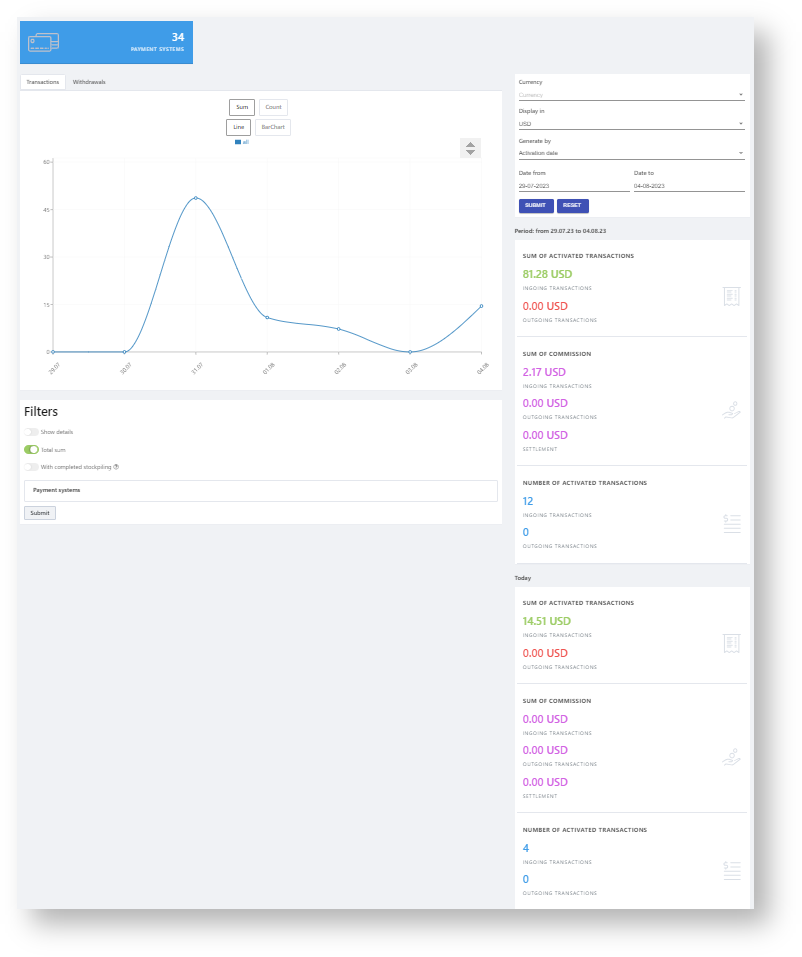

The “Dashboard” page contains basic summary statistical information on payment systems. You can create a graph of transactions/withdrawals for a certain period, for a certain country, display data on the graph in a certain currency.
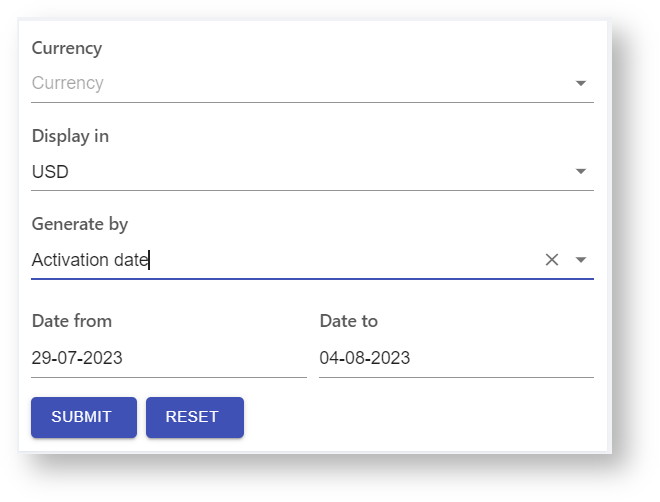

To do this, you need to specify the following data in the block with filters:
Name | Description |
Comments
Currency | Selecting the |
Select the currency from the drop-down list
Display in
Selecting the displayed currency
Select the country from the drop-down list
(“USD” is set by default)
currency for sorting data | |
Group by date | Selecting the |
Activation/
creation date/stockpiling end date
Selecting the activation/creation date/stockpiling end date
type of sorting by activation |
or creation date |
Date |
Selecting the period for which you want to view statistics |
Select the beginning of the period for which you want to view statistics from the drop-down calendar
Display in | Selecting the displayed currency. The values will be converted to the selected currency. (“USD” is set by default) |
| Show details | Enabling the “detailing” filter allows you to view the amount (or the number) of transactions in the arrival currency. |
| All transactions | Enables/disables the display of the line of the value of all transactions |
Date to
To start the search process, click the
Apply button. To clear the information entered in the fields, click the Reset button.
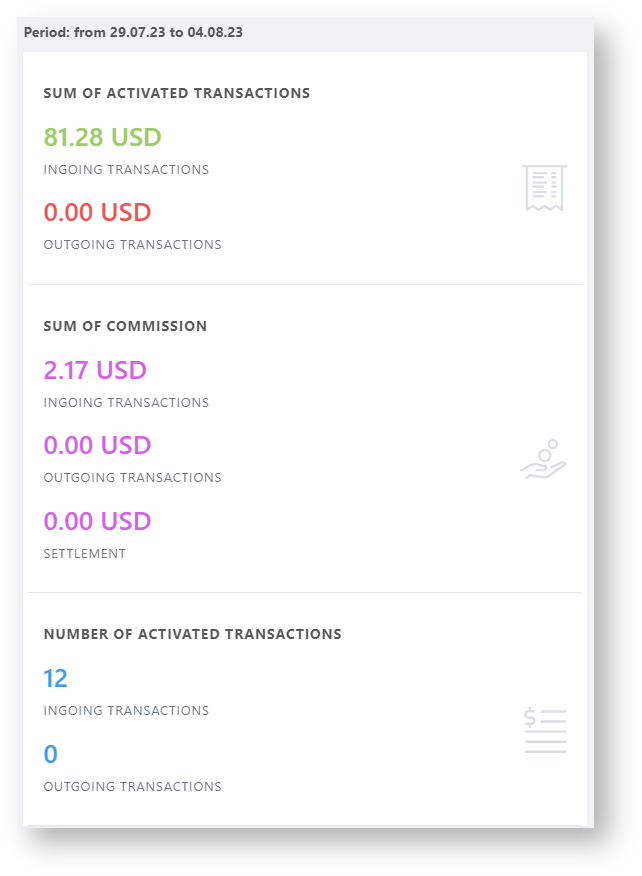
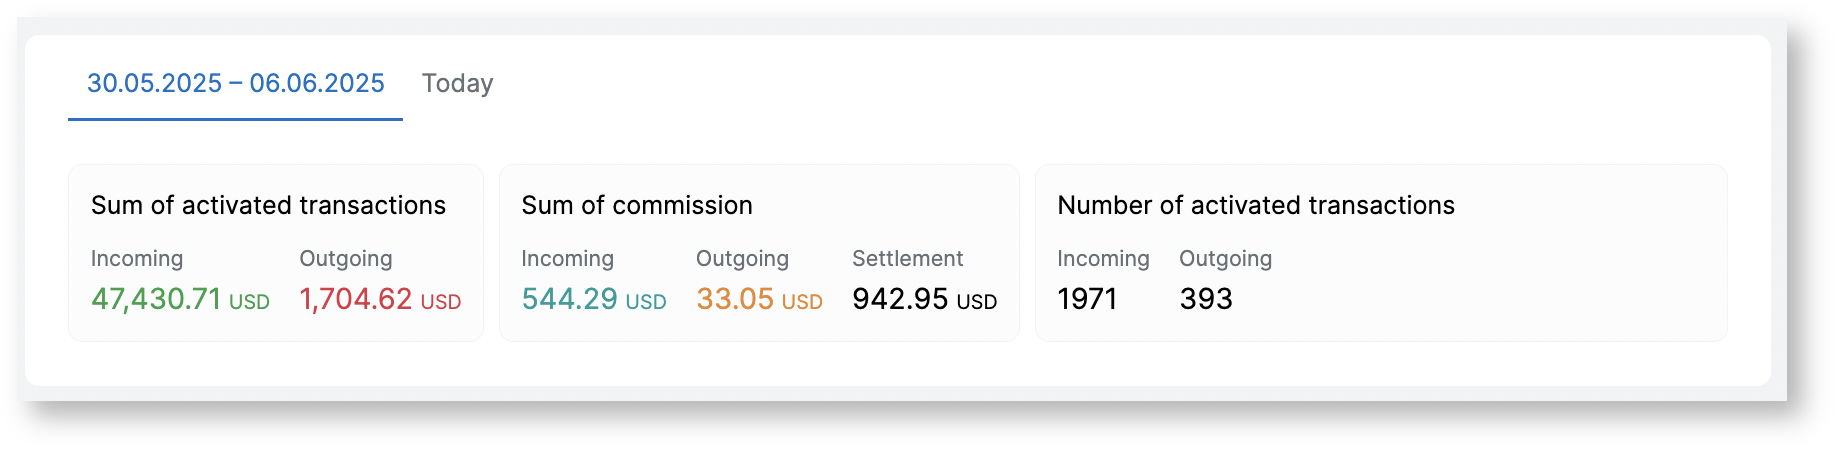
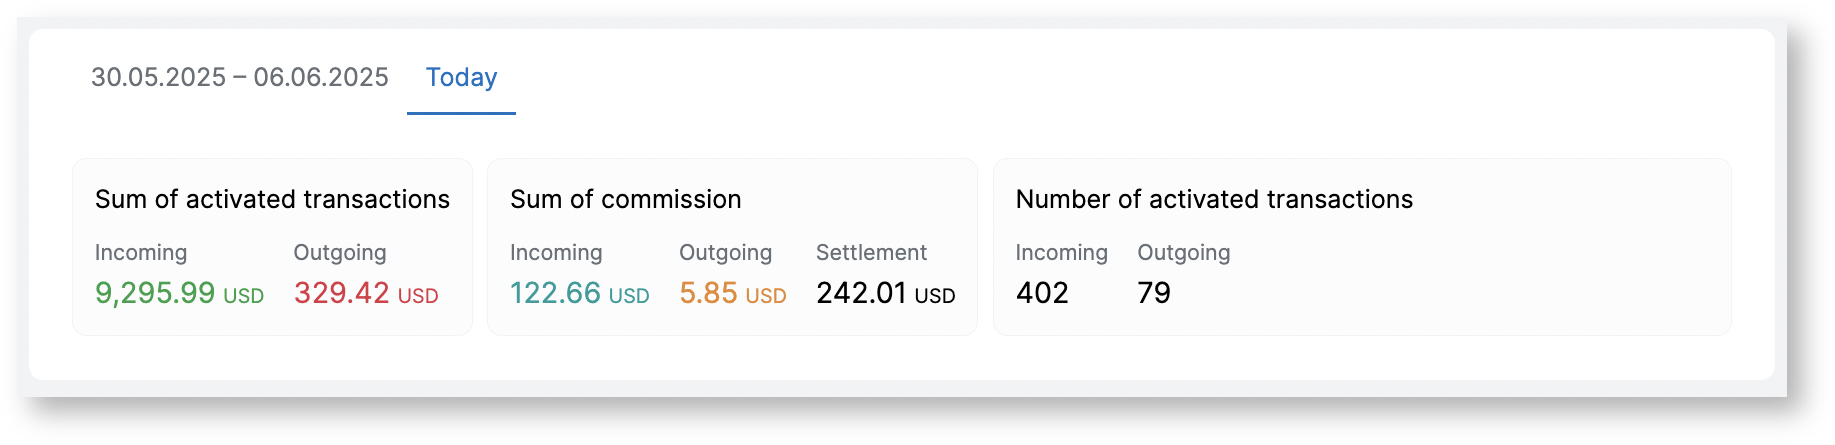
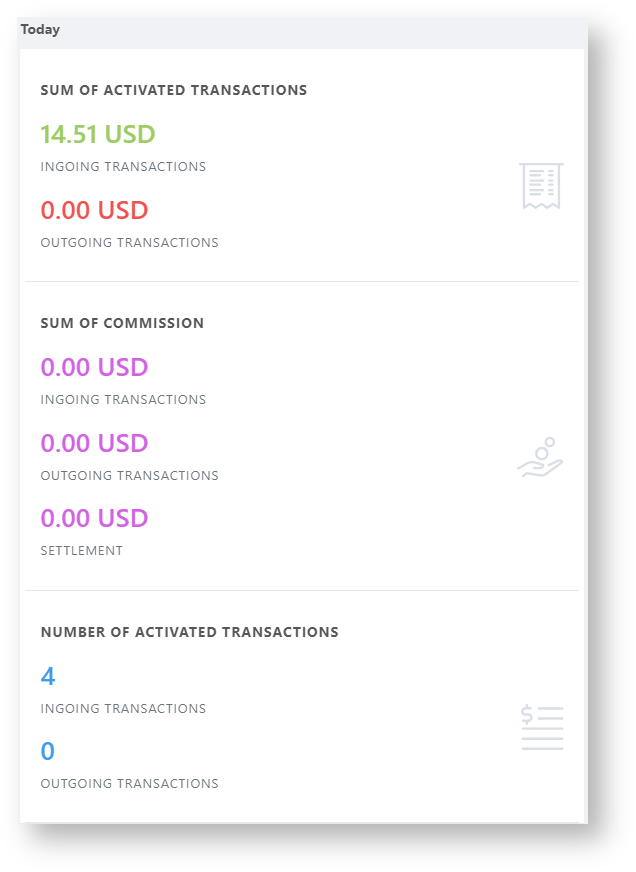
Statistical information on the amount of activated transactions, the number of activated transactions for the above period and similar information for the current day.
Deposits tab
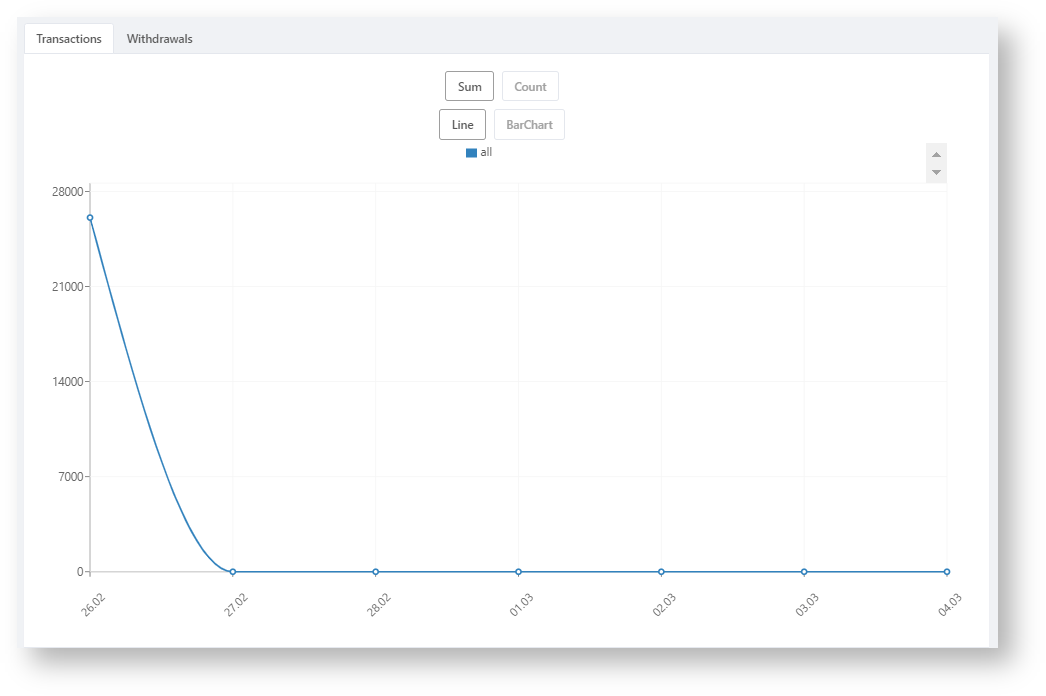

The
Deposits tab contains a graph that displays statistical information on transactions.
The displayed information is formed by clicking the buttons:

 - a graph of transaction amounts by day is displayed;

 - a graph of the number of transactions by day is displayed;

 - selecting the appearance of the displayed chart (graph);

 - selecting the appearance of the displayed chart (histogram).
 - enables/disables the display of data for selected payment systems.
Withdrawals tab
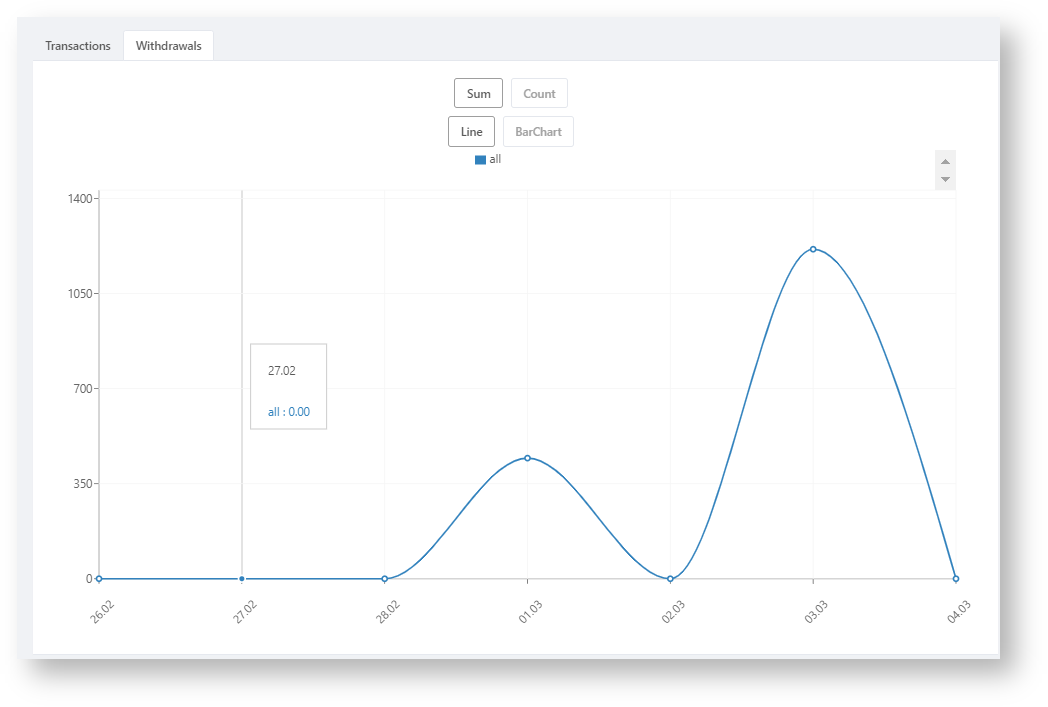
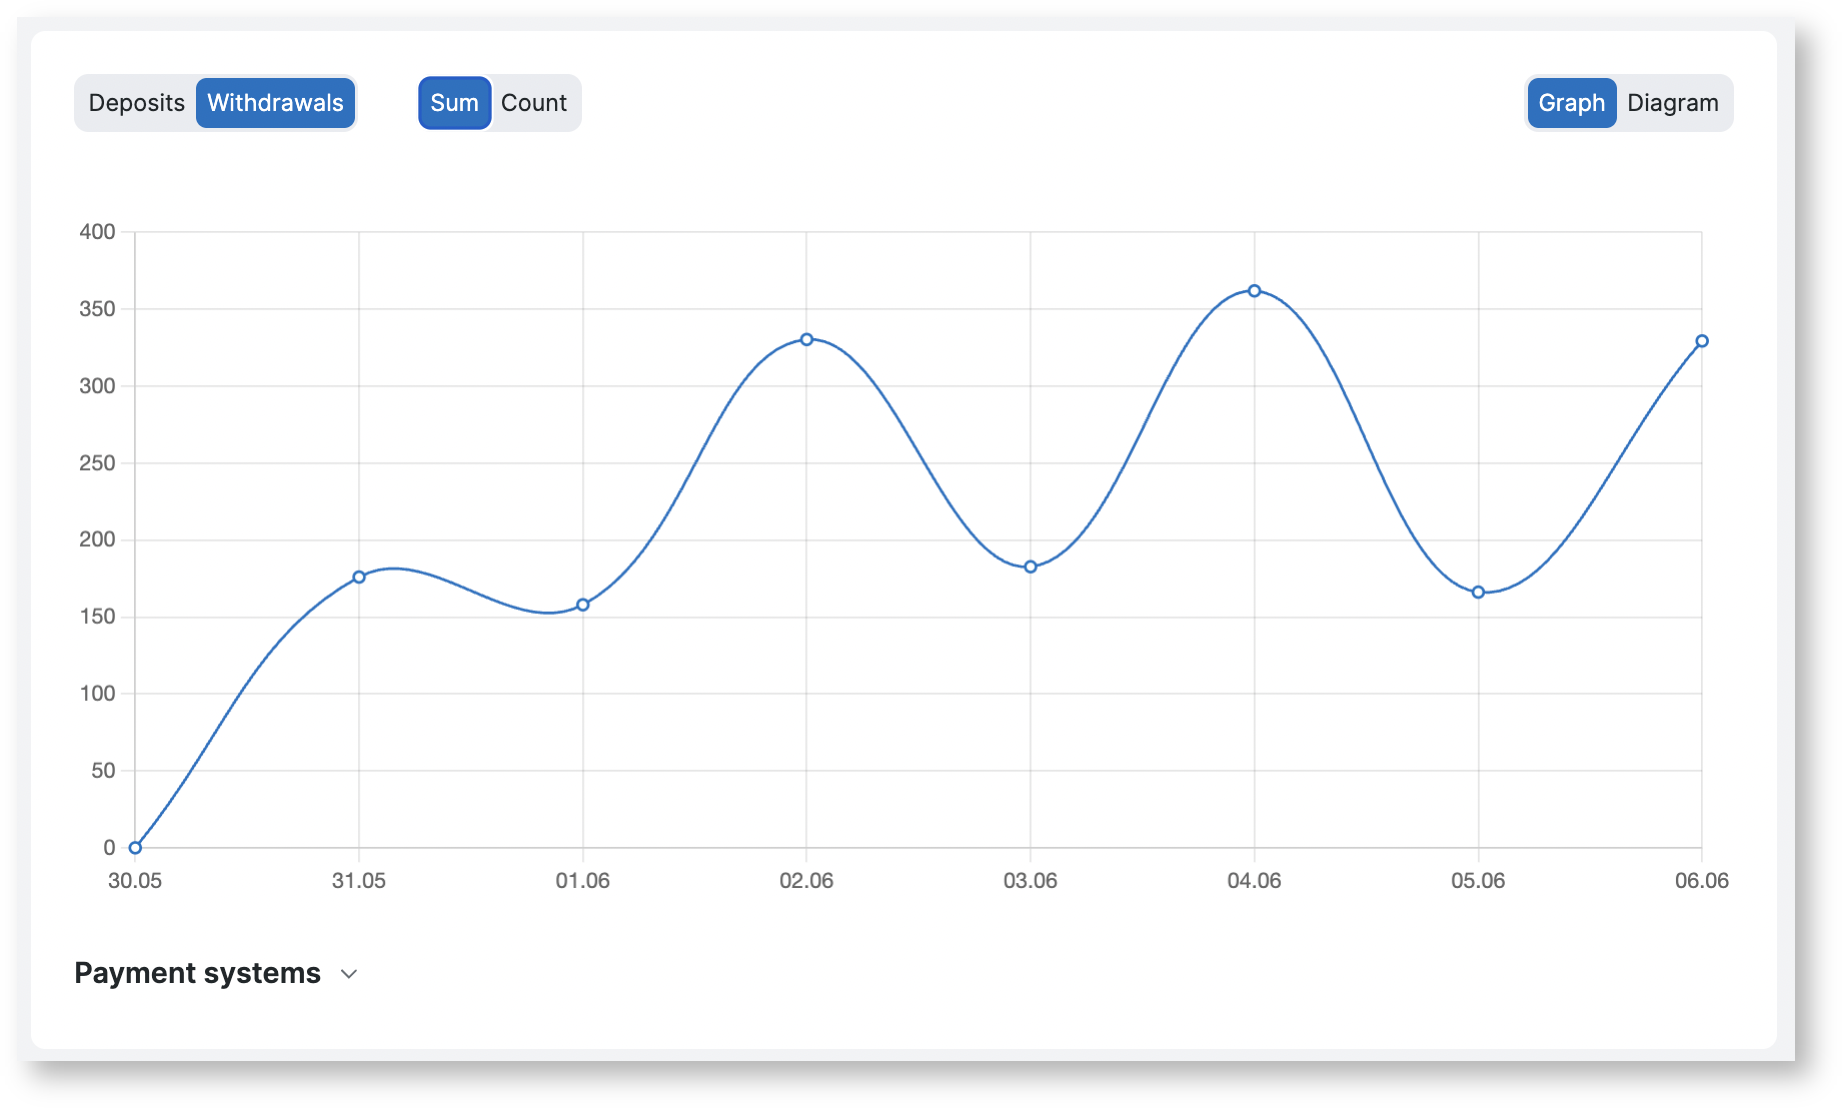
The Withdrawals tab contains a graph that displays statistical information on withdrawal of funds.
The displayed information is formed by clicking the buttons:
- a graph of transaction amounts by day is displayed;
- a graph of the number of transactions by day is displayed;
- selecting the appearance of the displayed chart (graph);
- selecting the appearance of the displayed chart (histogram).
Filters of tabs
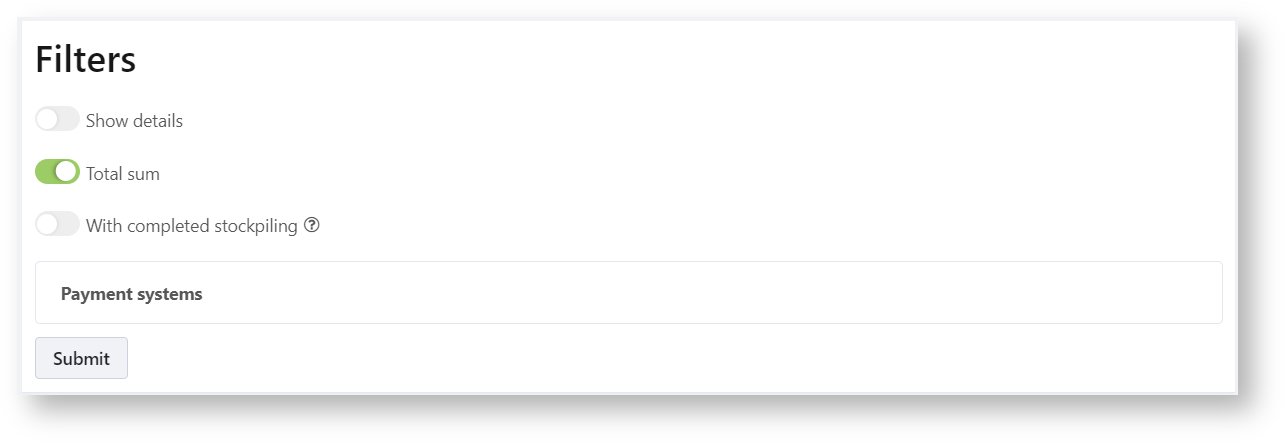
Filter
Description
Total sum
- enables/disables the display of
With completed stockpiling
Displaying on the chart the amount only for those transactions for which the accumulation is completed
Payment systems
data for selected payment systems.
Transactions
The tab displays a list of all transactions made by all types of electronic payment systems.
To go to the Transactions
page, select the menu item
Transactions →
Current.
![]()

![]()
Filters of the Transactions
page
Name | Description | Comments |
Basic filters | ||
| ID | Sequence number of the transaction in the system | Manual input |
Type of electronic payment system
Select the type of the payment system from the drop-down list
Label | User ID |
in the |
Client's system | Manual input | |
Transaction number | Transaction identification number | Manual input |
Order ID | Transaction ID in the Client's system | Manual input |
Direction
Transaction direction
Select the direction of the transaction from the drop-down list:
- All;
- Incoming;
- Outgoing.
Transaction number
Transaction identification number
Manual input
More filters | ||
Counterparty | Counterparty | |
ID | Manual input |
Wallet type |
Type of electronic payment system | Select the type of the |
payment system from the drop-down list |
- All;
- Manual;
- Auto.
Direction | Transaction direction | Select the direction |
of the transaction |
from the |
drop-down list:
|
Postback status
Postback status
Select the postback status from the dropdown list:
|
| ||
| Creation date | ||
"Date from" | Period for which you need to view statistics | Select the beginning of the period for which you want to view statistics from the drop-down calendar |
"Date to" | select the end of the period for which you want to view statistics from the drop-down calendar | |
| Activation date | ||
| "Date from" | Period for which you need to view statistics | Select the beginning of the period for which you want to view statistics from the drop-down calendar |
| "Date to" | select the end of the period for which you want to view statistics from the drop-down calendar | |
| Originality | Sign responsible for the authenticity of the transaction | Select the postback status from the dropdown list:
|
Postback status | Postback status | Select the postback status from the dropdown list:
|
After specifying all the necessary search parameters, click the
Apply button. To reset the set parameters, click the Reset button.
To update data on the tab, click the button
 .
.
![]()
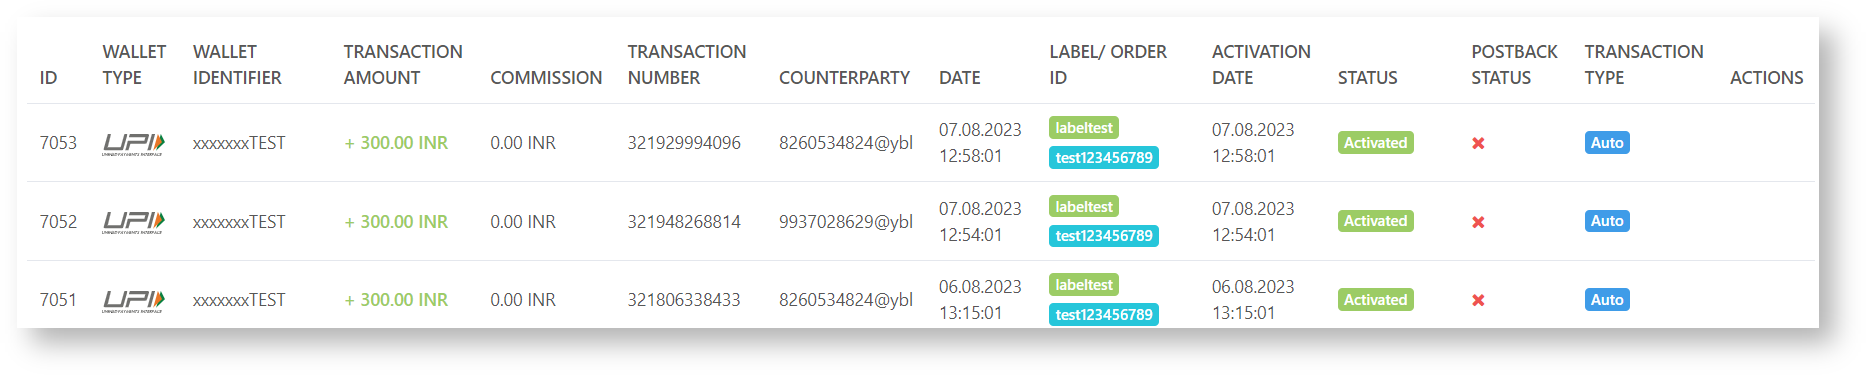
Columns of the table of the Transactions
page
Name | Description |
Wallet type | Displays the type of the electronic payment system |
| ID |
Displays a sequence number of the transaction in the system | |
| Wallet number | Displays wallet number |
Amount | Displays the transaction amount |
| Commission | Displays transaction fee |
| Date created/activated | Displays the creation and activation date of the transaction |
Label | Displays the |
Data
Displays the date and time when the transaction was logged
Label/Order ID
Displays the unique identifier of the user
user ID in the Client's system | |
Order ID | Displays the transaction ID in the Client's system |
Transaction number | Displays the transaction number |
Counterparty | Displays the ID of the counterparty |
Status | Displays the status of the completed transaction |
| Postback status | Displays the status of the |
Displays the type of transaction
postback |
Withdrawals
The tab displays a list of all withdrawals made by all types of electronic payment systems.
To go to the
Withdrawals page, select the menu itemPayments →
Withdrawals.


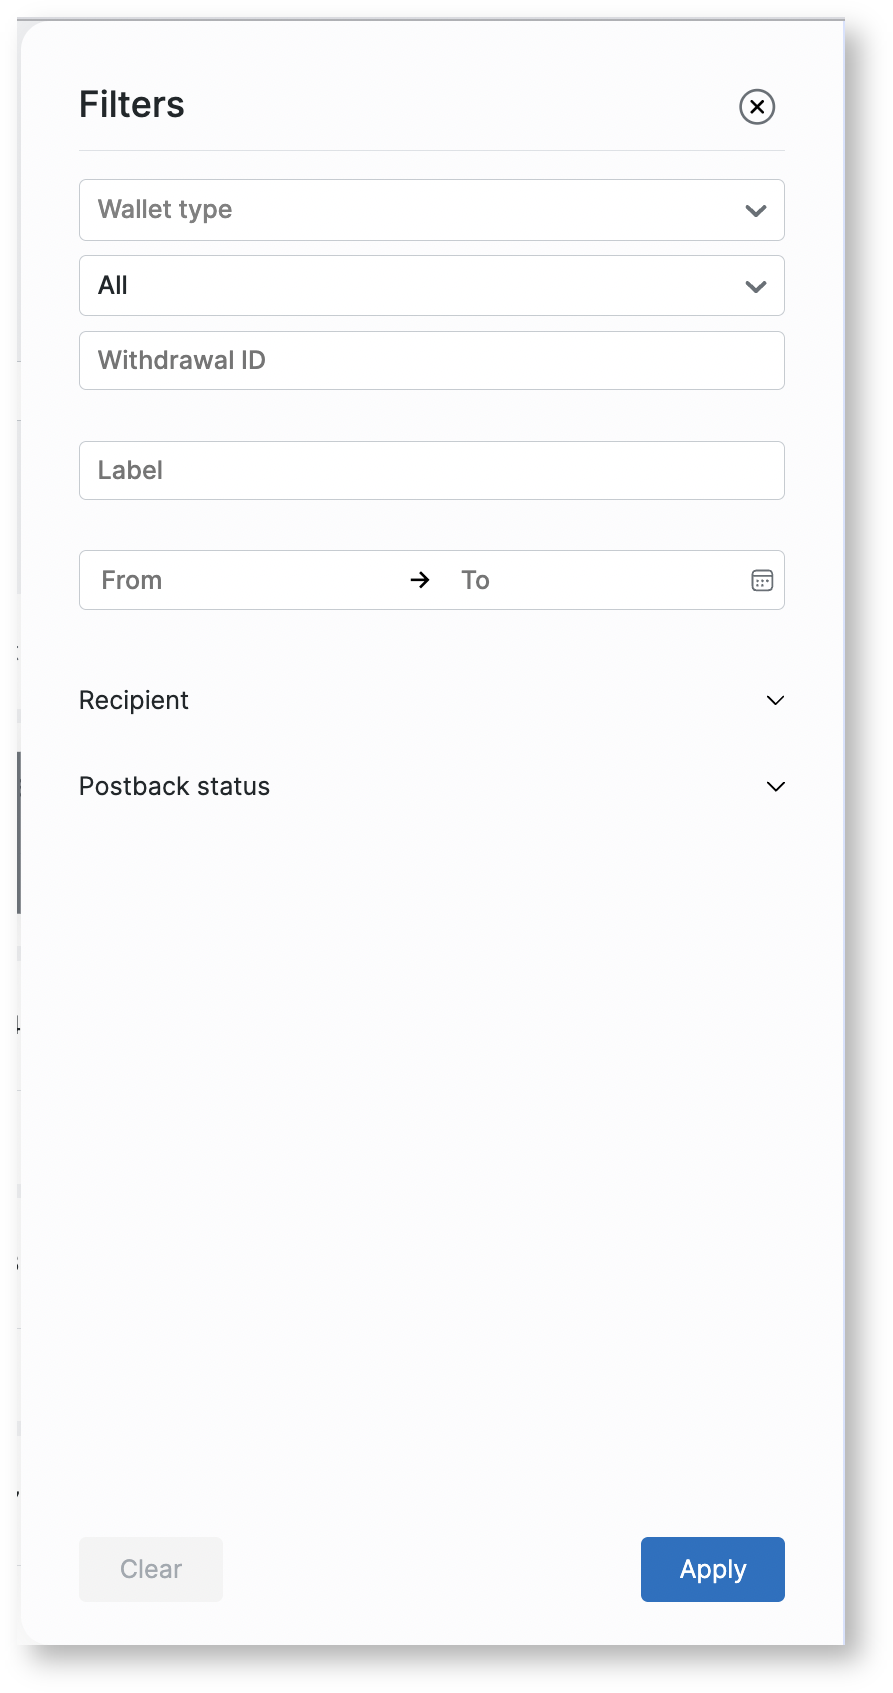
Filters of the Withdrawals
page
Name | Description | Comments |
Basic filters | ||
|---|---|---|
Wallet type | Type of electronic payment system | Select the type of the payment system from the drop-down list |
Recipient's wallet number
Manual input
Label
User ID on the client system
Manual input
Postback status
Select a postback from the dropdown list:
Received;
Error.
Withdrawal ID
Withdrawal ID
Manual input
Status | Withdrawal status | Select the withdrawal status from the drop-down list:
|
Withdrawal ID | Withdrawal ID | Manual input |
Label | User ID on the client system | Manual input |
Date from | Period for which you need to view statistics | Select the beginning of the period for which you want to view statistics from the drop-down calendar |
Date to | Select the end of the period for which you want to view statistics from the drop-down calendar | |
More filters | ||
|---|---|---|
Recipient | Recipient's wallet number | Manual input |
| Postback | Postback status | Select a postback from the dropdown list:
|
After specifying all the necessary search parameters, click the
Apply button. To reset the set parameters, click the Reset button.
To update data on the tab, click the button
.
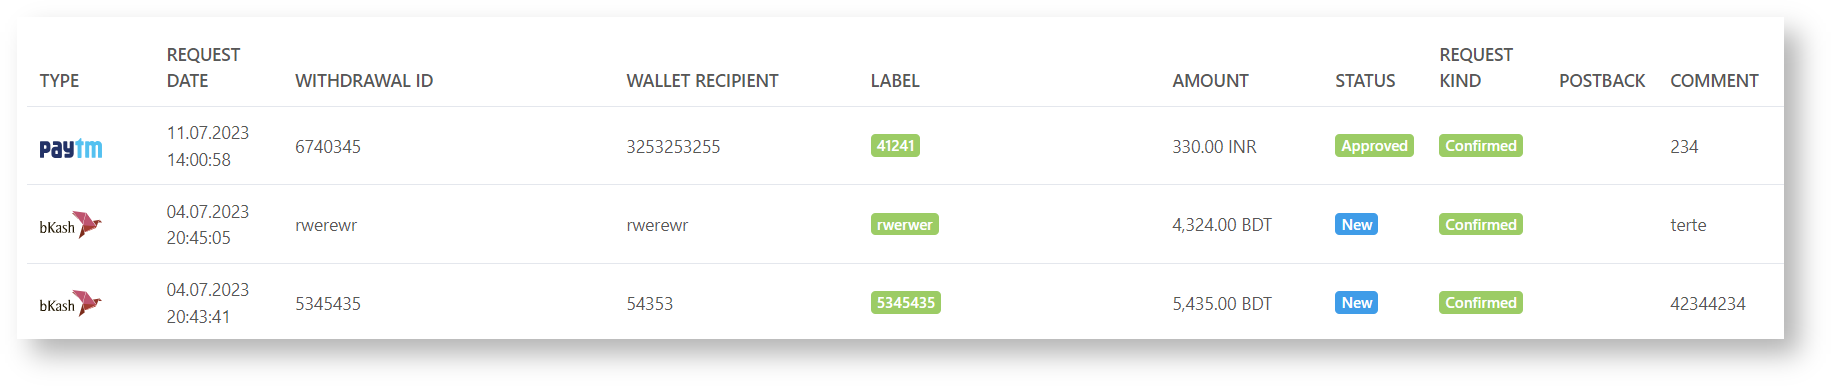
Columns of the table of the Withdrawals
page
Name | Description |
Wallet type | Displays the type of the electronic payment system |
ID | Sequence number of the withdrawal in the system |
Request date |
Displays the date and time when the withdrawal was logged | |
Amount | Displays the withdrawal amount |
Withdrawal ID | Displays the withdrawal number |
Wallet sender | Displays the sender's wallet number |
| Wallet recipient | Displays the recipient's wallet number |
Label | Displays the |
Amount
Displays the withdrawal amount
Status
Displays the status of the completed withdrawal
unique user ID in the Client's system | |
| Comment | Displays a comment |
| Request kind | Displays the type of request for withdrawal |
| Postback | Displays the status of the postback |
Status | Displays |
Create withdrawal request
To create a withdrawal request, you need to go to the Withdrawals pagePayments → Withdrawals and perform the following steps
Press the button Add withdrawal request
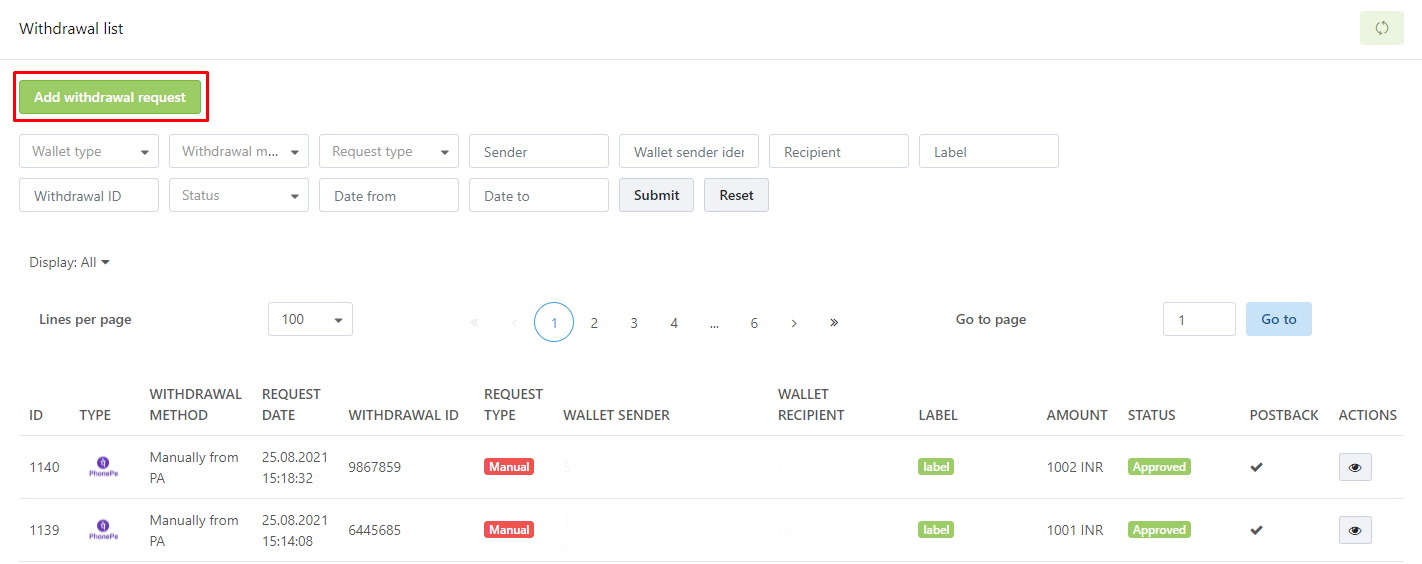

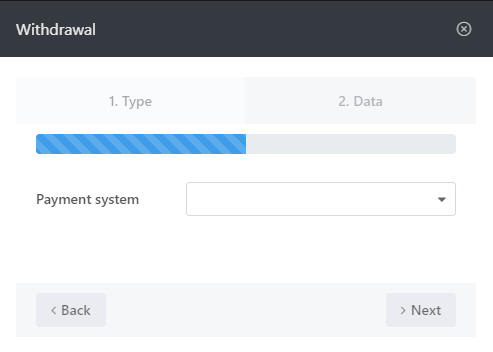
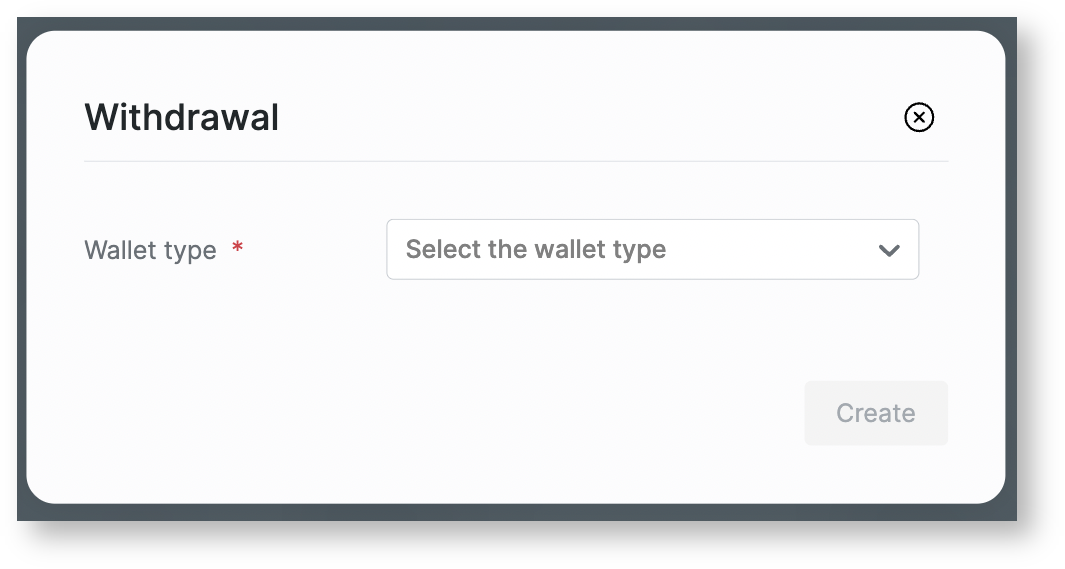
Select payment system (wallet type) from list
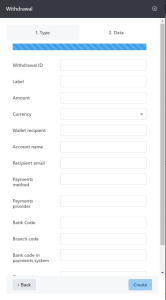
- Fill in the fields to create the request in the next
- window (the list of fields is standardized and not all fields are required. To create a request for a specific
- payment system, you should fill in the required fields for
- this payment system)


Setting up an account
If you need to change your account settings, select the menu item
User → Settings
.
Find the section called “Settings’ in the opened window.
“Profile settings” section
"Profile section
In this section, the client can change the
interface language.
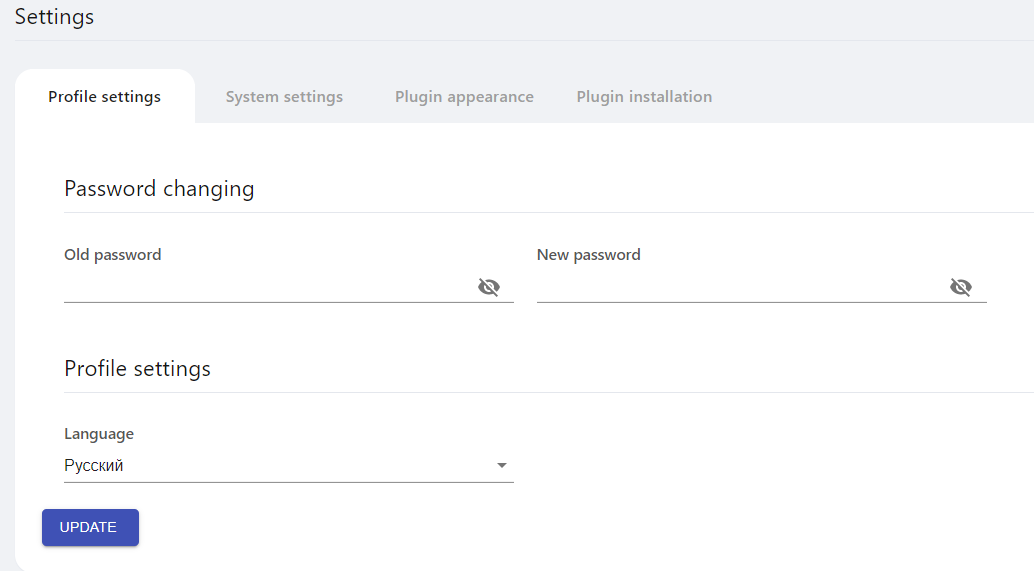
Name
Description
Old password
field for entering the current password from the account
New password
field for entering a new password from the account
Language
field of selecting the language display
To save the entered information, click the “Update” button.
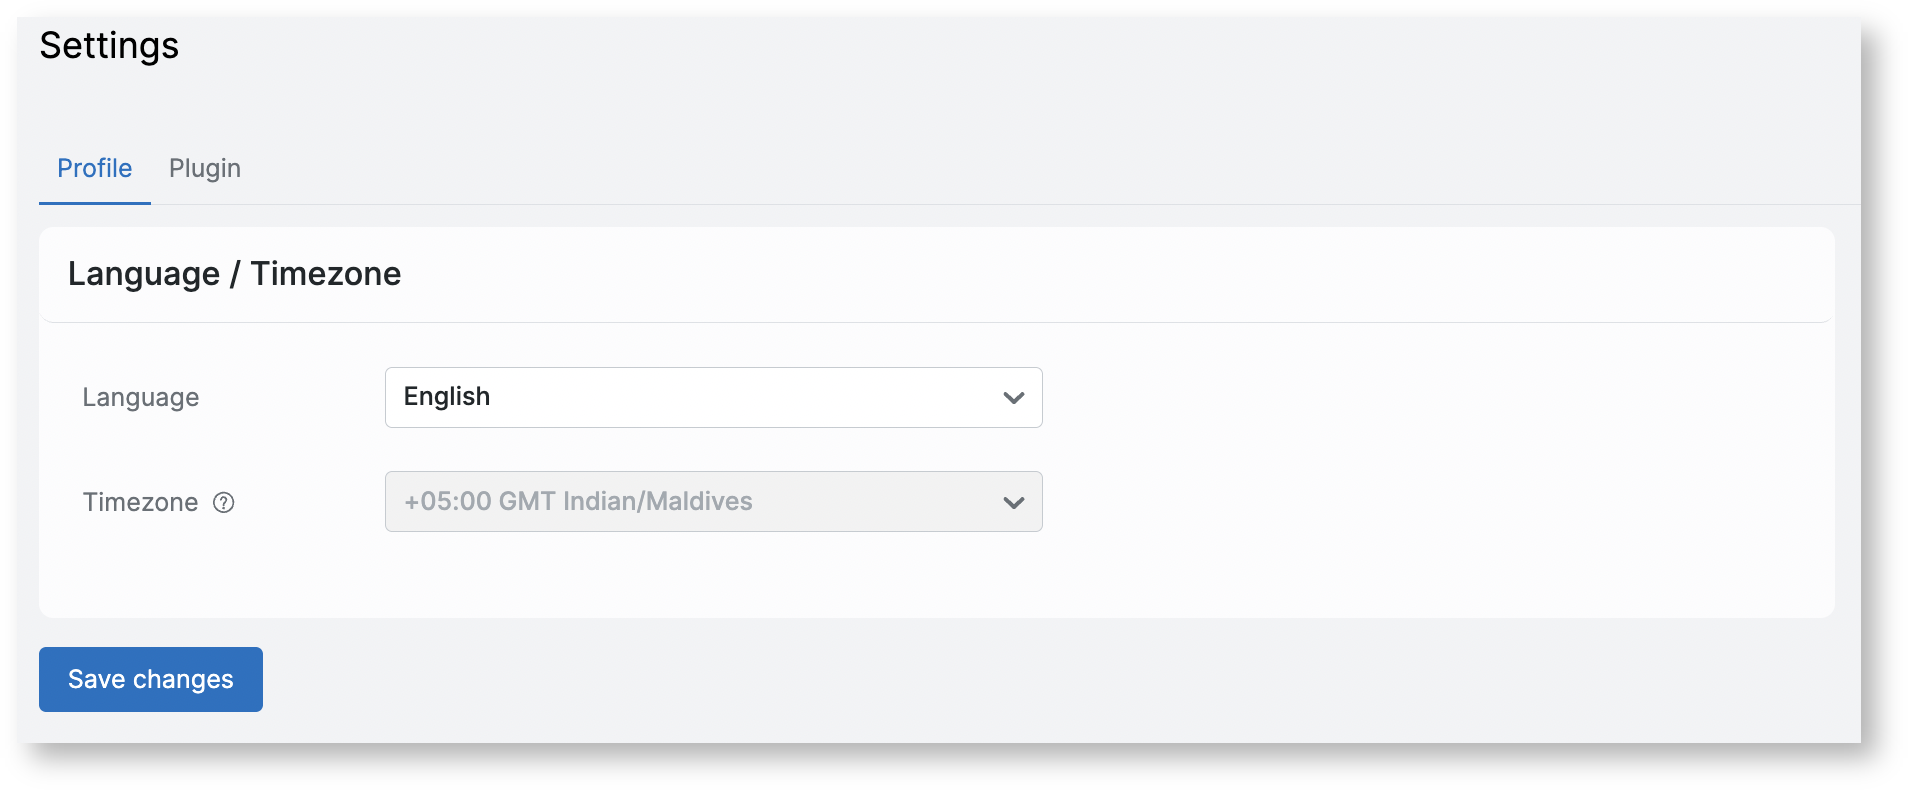
“System settings” section
In this section the system settings are made, such as:
- Setting postbacks
- Setting the behaviour of the system after the payment is made
- Setting the time zone
"Plugin appearance" section
"Plugin" section
Plugin setting
There is a description of settings of the plugin in this section.
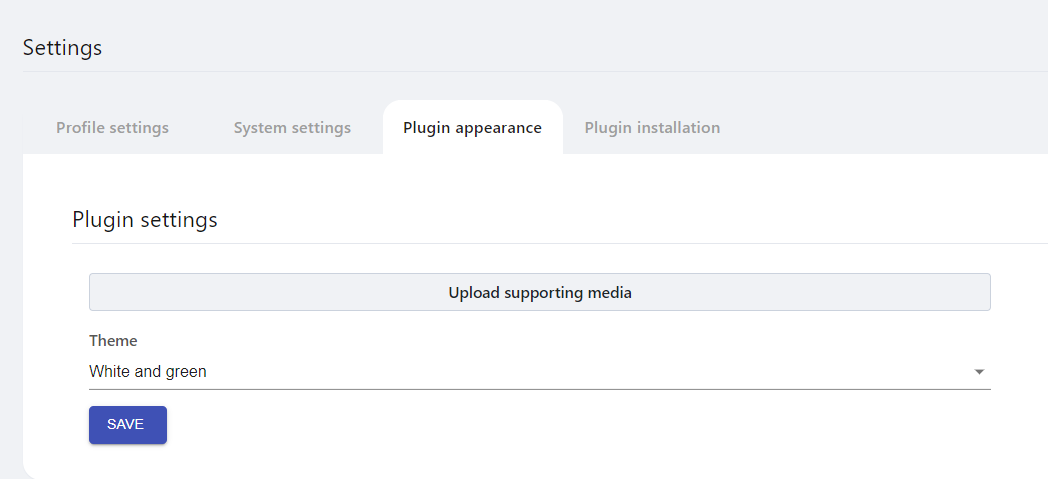

Name | Description | Comments |
|---|
Uploading payment system prompts
Uploading is made by dragging and dropping files in gif format
Theme | Select the appearance of the plugin display from the drop-down list | Available options:
|
File | If “Own” is selected in the Theme section, the file field for uploading css styles opens |
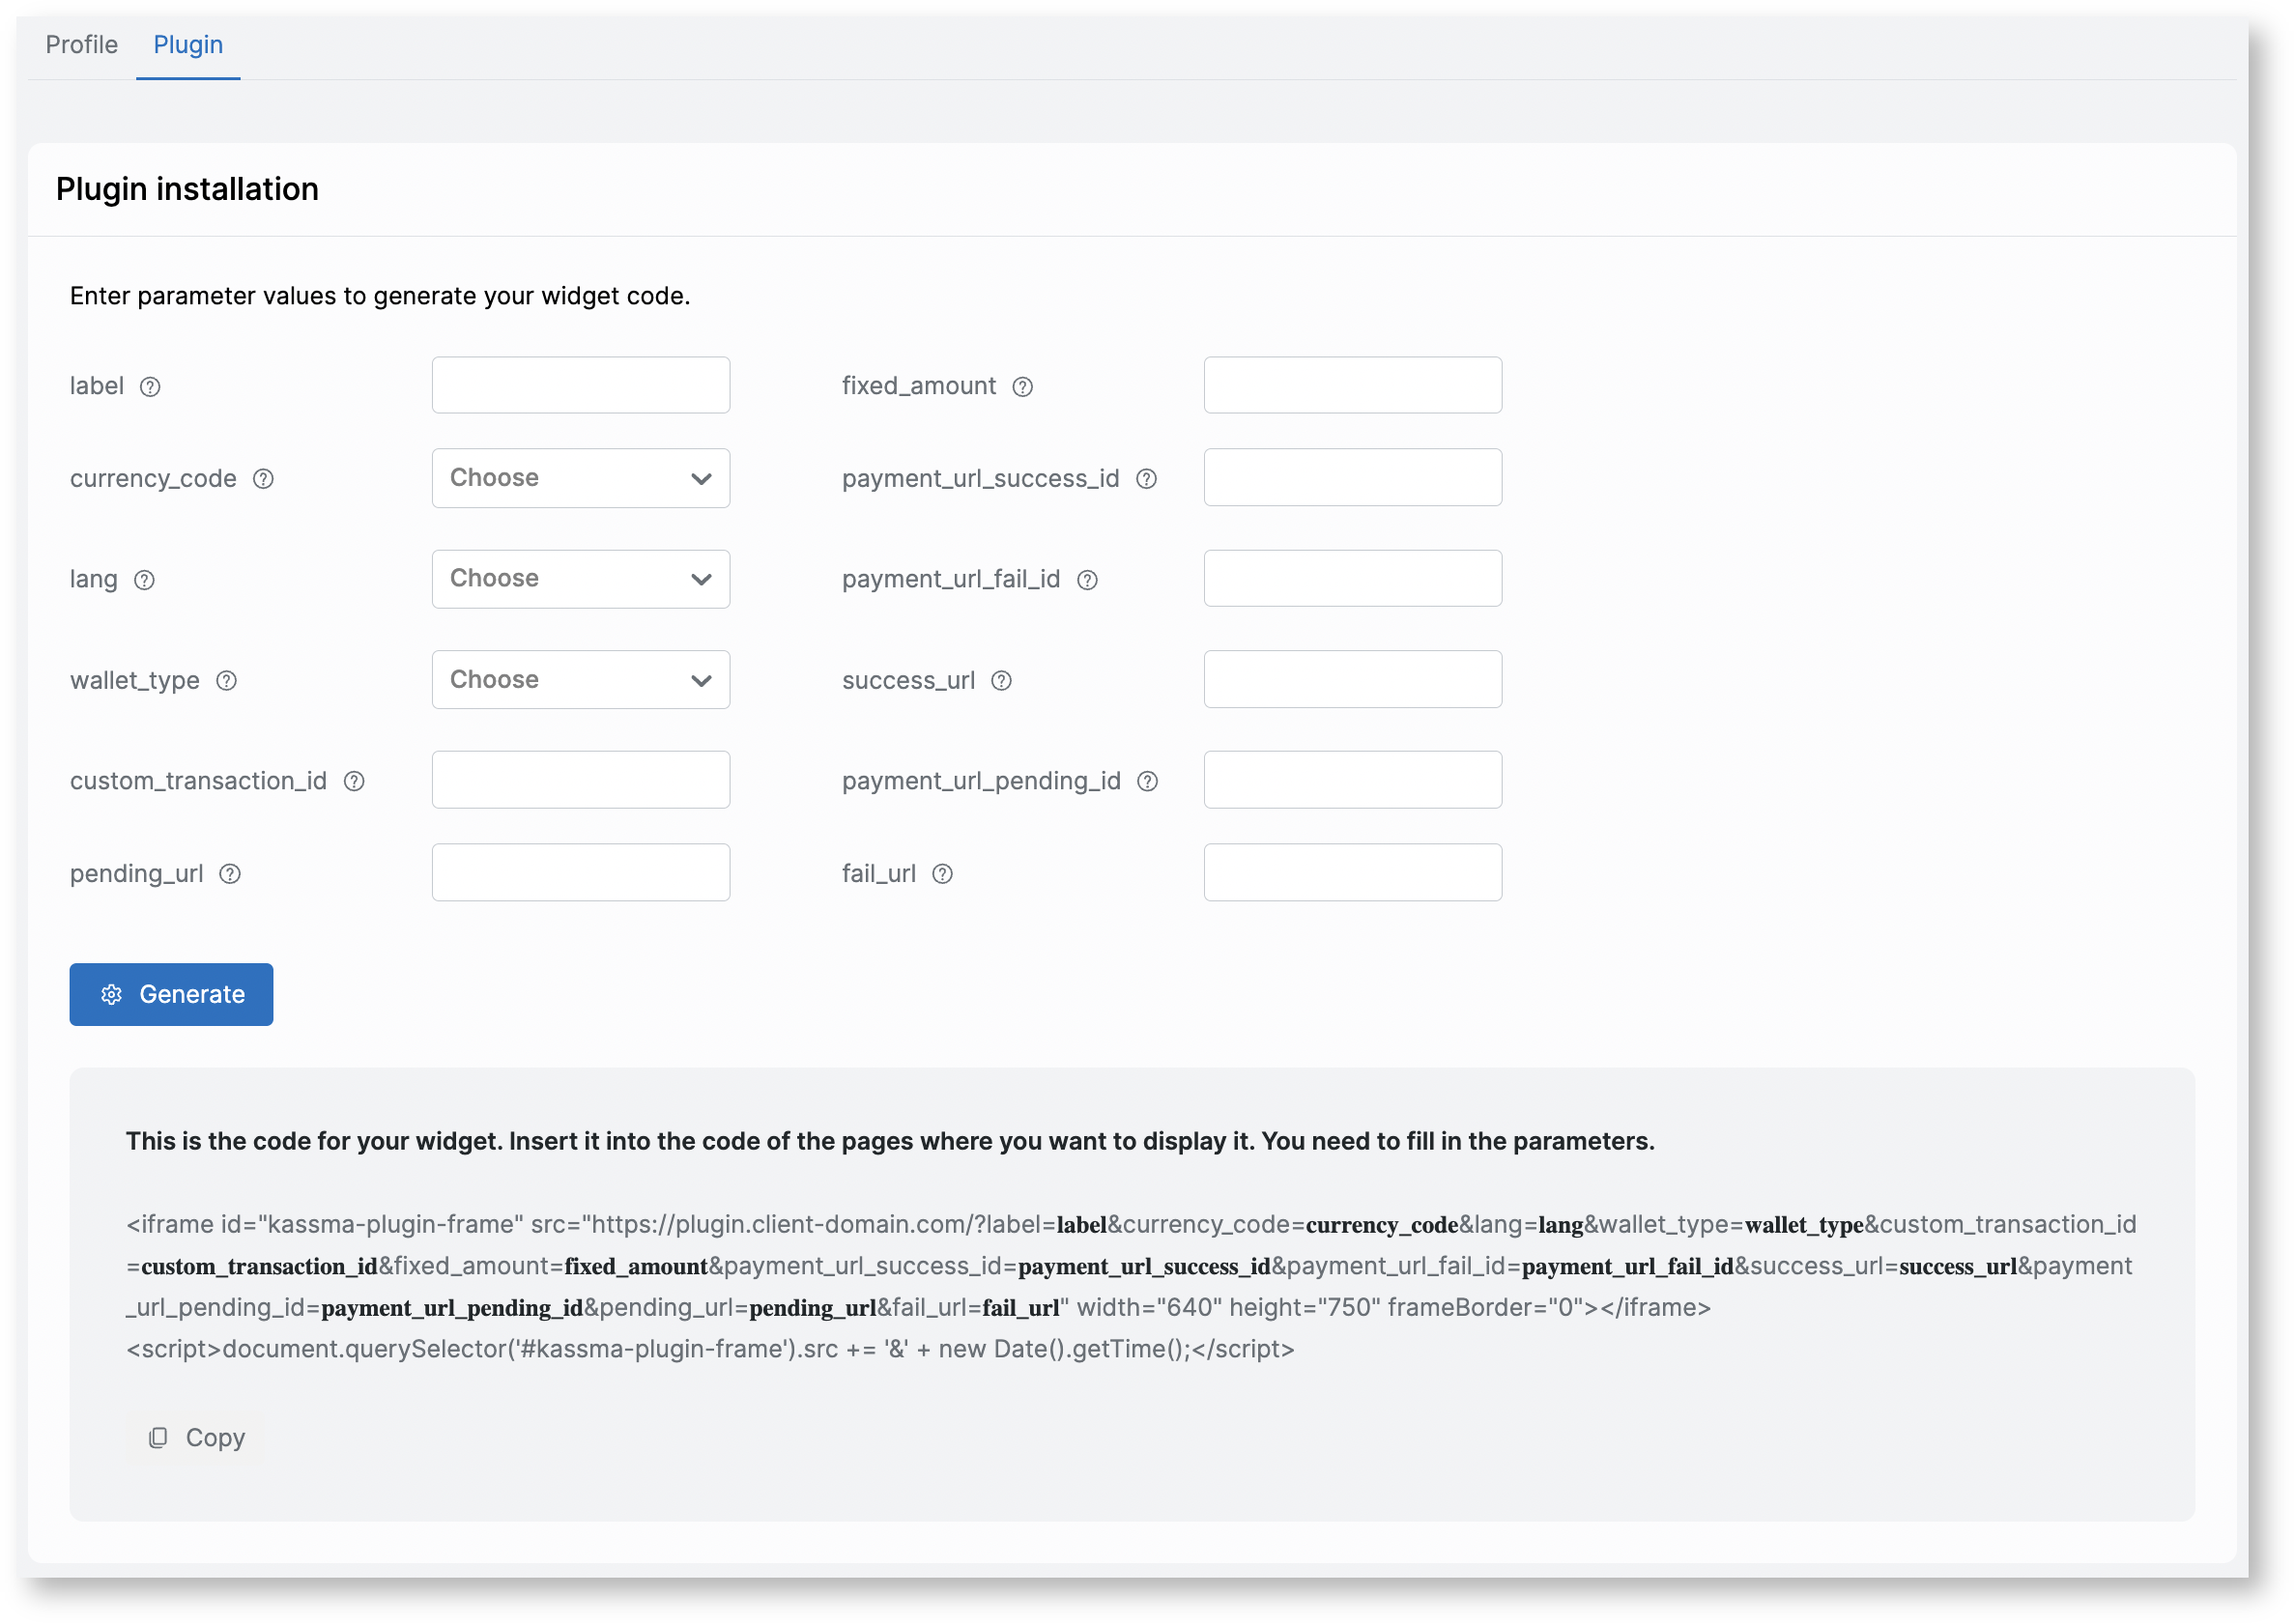
Plugin installation
Search for a completed transaction
If there is a situation when the user claims that he made the transfer, but he didn’t receive money in the system, you need to go to the
“Transactions” section in your Personal account using following way:

Pic 1. Way to the “Transactions” page
Transactions → Current.
![]()
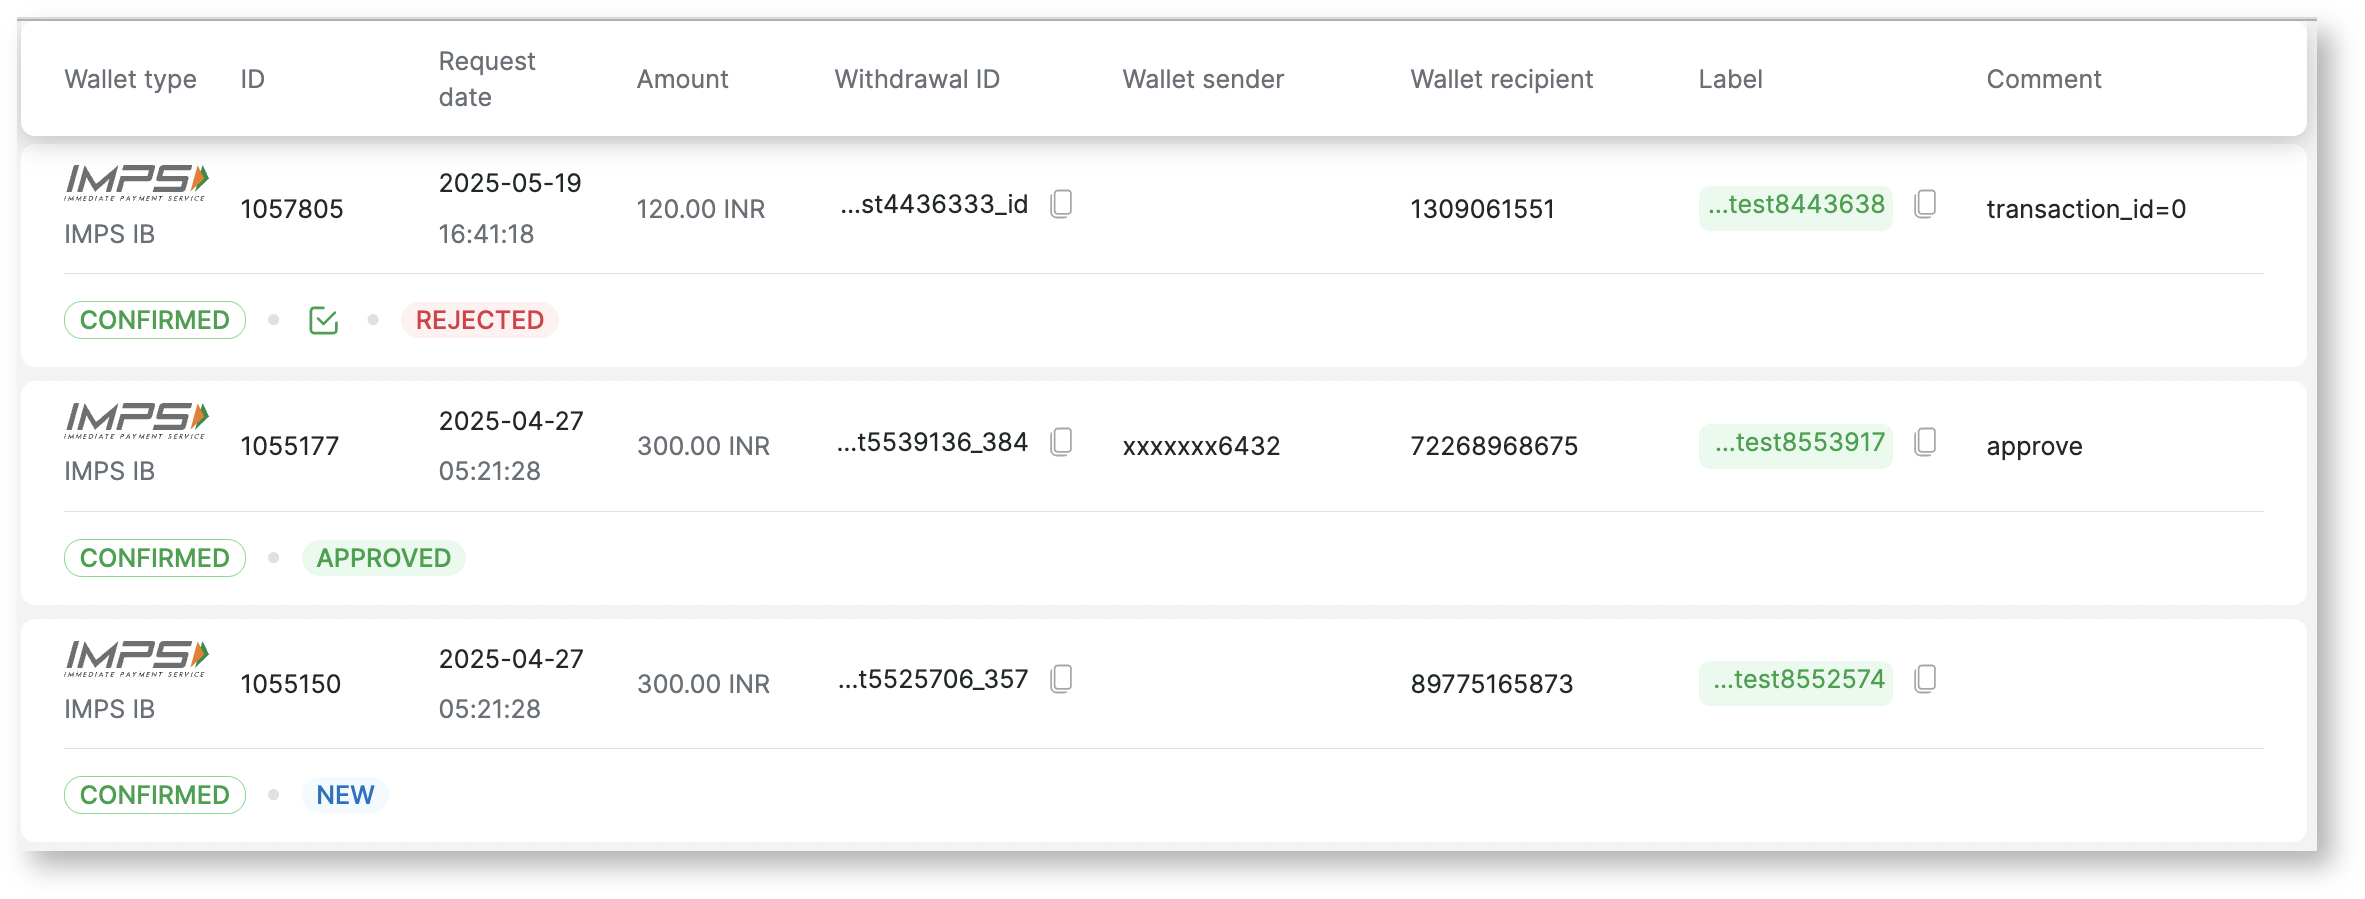
Then all user transactions will be displayed on the page, you need to find the user’s transaction by “Transaction number” or
“Order ID” and pay attention to “Status” and “Postback status”

Pic 2. “Transactions” page
![]()
There are
2 types of postback statuses:
| The transaction is activated and the postback about the successful payment is sent |
![]()
The transaction is activated, but the user has transferred funds for an amount less than the minimum deposit, the system is waiting for the user to replenish the amount again to reach the minimum deposit threshold, i.e. accumulation process in underway
![]()
The transaction is not activated, the system does not see the accumulation and does not send a postback waiting for the moment of activation of the transaction
| Sending postback error |
| Info |
|---|
That is the transaction is successfully received only when the system has activated the transaction |
. |
Delayed automatic activation of transactions
The functional of Delayed automatic activation of transactions is enabled by Paykassma TP upon request. This functional has given a good account of itself when working with users who carry out numerous transactions in a row. In this case, the information on deposits required to activate transactions may come to Paykassma with a slight delay (up to 5 minutes).
When the functional is enabled, if the activation data that users enter are not in the system, then:
- Paykassma automatically stores the entered data and displays the following window to the user:
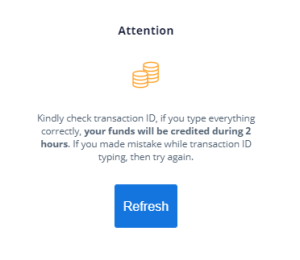
- When Paykassma receives information about a completed payment from the Payment System, activation will be done automatically. Additional participation and active actions from the user are not required.